

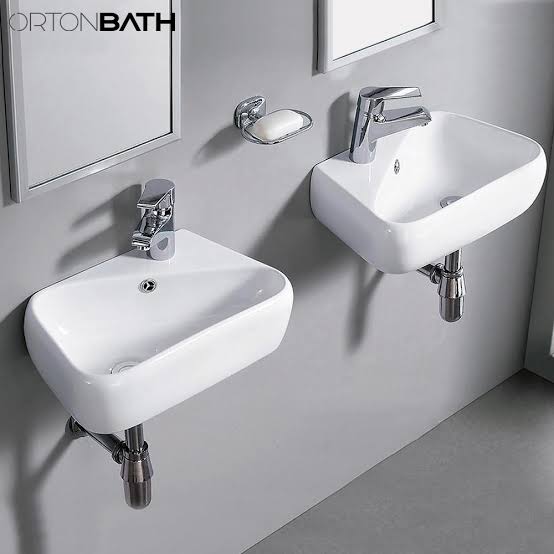
Installing a washbasin in a compact toilet room requires careful planning to make the best use of the available space. Limited wall area, narrow walkways, and existing plumbing can make the installation more challenging than fitting a basin in a larger bathroom. However, with accurate measurements and the right installation method, it is possible to create a functional handwashing area without overcrowding the room.
Before beginning the project, homeowners should evaluate the layout, mounting requirements, and drainage connections. Choosing a suitable Small Basin for Toilet can help preserve valuable floor space while providing convenient access to essential washing facilities. The following steps explain how to prepare for installation, avoid common mistakes, and maintain the basin after fitting.
1. Measure the Available Space
The first step is to determine exactly where the basin will fit. Measure the available wall width, the distance between the proposed basin location and the toilet, and the space required for the door to open fully.
Pay particular attention to the basin’s projection, which determines how far it extends into the room. A model that fits the wall but projects too far may obstruct movement or make the toilet uncomfortable to use.
Also consider the position of nearby fixtures, towel holders, and storage units. Creating a simple floor plan with the dimensions of each item can help identify potential problems before installation begins.
2. Choose a Suitable Basin Design
Different basin styles offer different advantages in restricted spaces. Selecting the right type can simplify installation and improve the overall layout.
Wall-Mounted Basins
Wall-mounted basins attach directly to the wall, leaving the floor underneath open. This can make a narrow toilet room appear less crowded and simplify cleaning.
Before choosing this style, confirm that the wall can support the basin safely. Some installations require additional reinforcement, particularly when the wall construction is unsuitable for direct mounting.
Corner Basins
Corner basins fit into the junction of two walls and make use of areas that might otherwise remain unused. They can be particularly effective in narrow toilet rooms or irregularly shaped spaces.
Check that the basin provides adequate bowl space and that the tap remains easy to reach. The surrounding walls should not interfere with comfortable handwashing.
Compact Vanity Basins
A small vanity basin combines a washing area with a cabinet or supporting surface. It can provide useful storage for toiletries and cleaning supplies.
However, the cabinet occupies additional floor space. Measure the complete unit, including its depth and door clearance, before deciding whether it suits the room.
3. Check Plumbing and Drainage Requirements
Before purchasing a basin, examine the existing plumbing arrangement. The position of the water supply lines, waste outlet, and tap connections can influence which models are suitable.
Check whether the basin includes pre-drilled tap holes or requires a wall-mounted tap. Also confirm the size and position of the drainage connection to determine whether modifications may be necessary.
If you are replacing an existing basin, choosing a model with compatible plumbing connections may reduce installation time and expense.
Review the manufacturer’s technical drawings and installation instructions before proceeding. If water supply lines or drainage pipes need to be relocated, consult a qualified plumber.
4. Prepare the Installation Area
Proper preparation helps prevent fitting problems and protects the surrounding surfaces.
Before removing an existing basin, shut off the water supply and make sure the area is safe to work in. Disconnect the old fixture carefully and inspect the wall, floor, and visible plumbing for damage or moisture.
Repair any unsuitable surfaces before installing the new basin. For wall-mounted models, identify the appropriate structural support and use mounting hardware specified by the manufacturer.
Gather the necessary tools and fittings in advance. Depending on the installation, these may include a measuring tape, level, drill, suitable fixings, plumbing connectors, and compatible sealant.
If you discover damaged pipes, significant water damage, or an unsuitable wall structure, resolve these issues before continuing.
5. Mark the Basin’s Position Accurately
Accurate marking helps ensure that the basin is level, correctly positioned, and aligned with the plumbing connections.
Use the manufacturer’s installation template or technical drawings to identify the mounting points. Mark the intended height and position, then check that the basin will not interfere with the toilet, doorway, or nearby accessories.
A spirit level can help verify alignment before drilling or fitting any brackets. Double-check all measurements because incorrectly positioned mounting holes can be difficult to correct once the installation begins.
For countertop or vanity basins, also confirm that the supporting surface and any required cutouts match the manufacturer’s specifications.
6. Secure the Basin Using the Correct Method
The mounting process depends on the basin design, wall construction, and supporting structure. Always follow the product’s installation instructions and use the recommended hardware.
Installing a Wall-Mounted Basin
Locate suitable structural support and fit the specified brackets or fixings. Position the basin carefully, check that it is level, and secure it according to the manufacturer’s instructions.
Do not rely on unsupported plasterboard or wall finishes to carry a basin’s load. Reinforcement or a suitable mounting frame may be required.
Installing a Corner Basin
Position the basin at the intended corner and check that it aligns with both walls and the plumbing connections. Secure it using the specified mounting system, ensuring that the fixture remains stable.
Allow enough room to access the tap and clean the surrounding surfaces.
Installing a Vanity Basin
Place the vanity on a stable, level surface and confirm that its plumbing openings align with the water supply and waste connections. Fit the basin according to the manufacturer’s instructions, paying attention to support and sealing requirements.
For all installation types, avoid overtightening fixings, as excessive force may damage the basin or mounting components.
7. Connect the Tap and Waste Fittings
Once the basin is securely mounted, install the tap and drainage components according to the manufacturer’s guidance.
Check that the tap matches the basin’s hole configuration and that the waste fitting is compatible with the outlet. Use the specified seals and connectors to help prevent leaks.
Connect the water supply lines carefully and make sure the pipes are not twisted or placed under unnecessary strain. The drainage pipe should also be aligned correctly to allow water to flow freely.
If the plumbing connections differ from the existing arrangement, professional assistance can help prevent leaks and drainage problems.
8. Apply Sealant Where Required
Sealing helps prevent water from entering gaps between the basin and surrounding surfaces. This is particularly important where moisture could damage a wall, countertop, or vanity cabinet.
Use a sealant compatible with the basin material and the adjacent surface. Ensure that the relevant areas are clean and dry before applying it.
Follow the manufacturer’s recommendations regarding sealant placement, application thickness, and curing time. Some joints may need to remain unsealed for ventilation, drainage, or maintenance, so avoid applying sealant indiscriminately.
Remember that sealant cannot compensate for poor mounting support or incorrectly installed plumbing connections.
9. Test the Installation for Leaks and Stability
Testing should be completed before the basin is used regularly.
Restore the water supply and operate the tap. Inspect the supply connections, waste fitting, and surrounding joints for signs of leakage.
Run water into the bowl and confirm that it drains properly without backing up. Check the basin’s stability and look for movement, uneven mounting, or visible gaps.
If the fixture shifts, the drainage is restricted, or a leak persists, stop using the basin until the problem has been corrected. A qualified plumber can inspect any issues that are difficult to identify.
10. Common Installation Mistakes to Avoid
Several common errors can reduce the effectiveness of a compact basin installation.
- Ignoring measurements: A basin that is too deep may obstruct movement even if its width is suitable.
- Using unsuitable wall fixings: Inadequate support can cause instability or damage.
- Overlooking plumbing compatibility: Incorrect tap or drain arrangements may require costly modifications.
- Installing the basin too close to other fixtures: Restricted access can make daily use uncomfortable.
- Applying sealant incorrectly: Poor sealing may allow moisture to reach surrounding surfaces.
- Skipping the final inspection: Small leaks or drainage issues may go unnoticed without testing.
- Choosing a bowl that is too small: A very shallow basin can cause excessive splashing during handwashing.
Taking time to verify each stage helps reduce the risk of avoidable repairs.
11. Maintain the Basin After Installation
Regular maintenance helps preserve the basin’s appearance and performance. Clean the surface using products recommended for its material, and avoid abrasive cleaners that may damage the finish.
Pay attention to the tap base, waste opening, and sealed joints, where soap residue and mineral deposits can accumulate. Wipe away excess water when necessary and inspect visible plumbing connections periodically.
If you notice a loose fitting, damaged seal, or persistent leak, address it promptly to reduce the risk of water damage. Keeping the basin clean and checking its connections can help extend its useful life.
Conclusion
Installing a compact basin in a limited toilet room requires careful measurement, appropriate mounting support, and compatible plumbing connections. Choosing a suitable design before beginning the work can help preserve floor space and simplify the installation process.
Homeowners should measure the complete installation area, follow the manufacturer’s instructions, and test all connections before regular use. When structural reinforcement or plumbing alterations are necessary, professional assistance is a sensible precaution.
With thoughtful planning and proper installation, a small basin can provide convenient handwashing facilities while keeping a compact toilet room organized, comfortable, and easy to maintain.
