

Introduction: Two Paths to Beautiful Finishes
Every painted surface tells a story of the method used to create it. When you run your hand across a freshly painted wall or admire the smooth finish on a newly refinished door, you are experiencing the result of countless decisions made by the painter who applied that coating. Among the most fundamental of these decisions is the choice between two time-honored application methods that have shaped the painting industry for generations. Understanding paint roller paint application versus brushed paint techniques is essential knowledge for anyone who wants to achieve truly professional results.
These two approaches to paint application are not competitors fighting for supremacy. Rather, they are complementary methods, each with unique strengths that make it ideal for specific situations. Paint roller application excels at efficiently covering large, open surfaces with consistent, even coatings. Brushed paint application offers precision, control, and access to areas that rollers simply cannot reach. The skilled painter understands both methods intimately and knows exactly when to employ each one for optimal results.
The distinction between these methods goes beyond mere technique. The type of paint you choose, the surface you are coating, the finish you desire, and even the environment in which you are working all influence whether paint roller paint or brushed paint application will produce superior results. Making informed decisions about application methods requires understanding the science behind how paint behaves when applied by roller versus brush, how different paint formulations respond to each method, and how surface characteristics interact with application technique.
This comprehensive guide will explore every aspect of paint roller and brush application methods. From the fundamental principles underlying each approach to advanced techniques that separate amateur work from professional craftsmanship, you will gain the knowledge needed to tackle any painting project with confidence. Whether you are a professional painter seeking to refine your skills, a contractor managing painting crews, or a homeowner committed to achieving quality results on DIY projects, the insights that follow will prove invaluable.
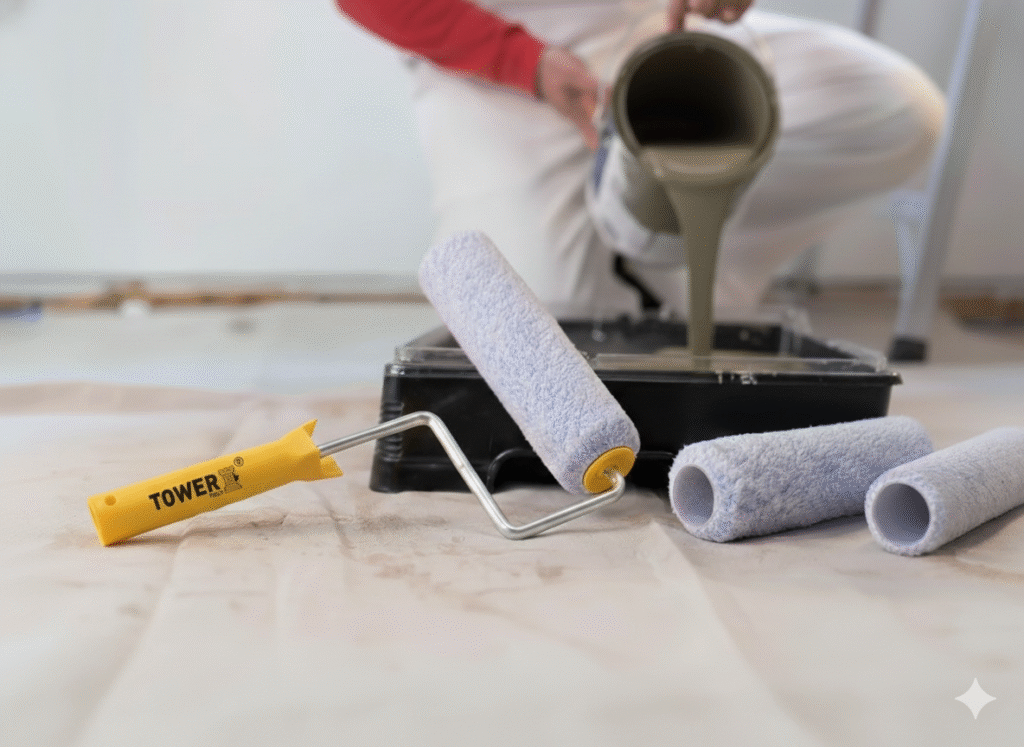
For painters in the UAE and throughout the GCC region seeking premium quality paints and application tools, Tower Tools offers an extensive selection of professional-grade equipment and supplies designed to produce exceptional results with both roller and brush application methods.
Understanding Paint Roller Paint Application
The paint roller paint application method revolutionized the painting industry when it was introduced in the mid-twentieth century. Before rollers became widely available, every square foot of wall or ceiling had to be covered using brushes alone, making large surface painting extraordinarily time-consuming and physically demanding. The roller changed everything by providing a means to apply paint quickly and evenly across expansive areas, transforming what had been a laborious process into efficient, satisfying work.
The fundamental principle behind roller painting is elegantly simple yet remarkably effective. A cylindrical cover absorbs paint from a tray or bucket, holding it within the fibers or foam of the cover material. As the roller moves across the surface, this paint is released through a combination of pressure and surface contact, leaving behind a consistent coating. The rolling motion ensures that paint is deposited without the directional marks that brush strokes can create, producing a more uniform appearance across large areas.
Understanding how paint roller paint application works at a detailed level helps explain why certain techniques produce superior results. When a properly loaded roller contacts a surface, paint transfers from the cover to the wall through a complex interaction of adhesion, cohesion, and mechanical forces. The pressure you apply, the speed of your rolling, the amount of paint on the roller, and the characteristics of both the paint and the surface all influence how effectively this transfer occurs.
The roller cover material significantly affects the painting process. Woven fabric covers provide durability and consistent performance across many paint types. Their structured fibers pick up and release paint predictably, making them reliable choices for general painting. Knitted covers offer excellent paint capacity and flexibility, conforming well to slightly irregular surfaces. Foam covers create ultra-smooth finishes by applying thin, even films without the texture that fabric covers can impart. Microfiber covers represent newer technology that combines good capacity with smooth release and reduced splatter.
Nap length, the thickness of the roller cover fibers, must be matched to surface texture for optimal paint roller paint results. Short nap covers work on smooth surfaces, depositing thin films without adding unwanted texture. Medium nap covers suit most standard walls with typical light texture. Long nap covers are necessary for heavily textured surfaces where extended fibers can reach into texture valleys for complete coverage. Mismatching nap to surface creates problems: too short a nap on textured surfaces leaves incomplete coverage, while too long a nap on smooth surfaces creates excessive texture.
The paint itself influences roller application success. Paints formulated for roller application typically have flow and leveling characteristics that help eliminate roller marks after application. They balance viscosity to allow good pickup on the roller while flowing out smoothly on the wall. Understanding these paint properties helps you select products that will perform well with paint roller paint techniques and achieve the smooth, professional results you desire.
The Art and Science of Brushed Paint Application
While rollers excel at covering large areas efficiently, brushed paint application remains essential for numerous painting tasks that rollers cannot address. The paint brush has been the fundamental painting tool for centuries, and despite technological advances in spraying and rolling equipment, brushes retain an irreplaceable role in professional painting. Understanding when and how to use brushed paint techniques is crucial knowledge for any serious painter.
The brushed paint method offers precision and control that no other application tool can match. When cutting in along edges where walls meet ceilings, trim, or other surfaces, a skilled painter with a quality brush creates crisp, clean lines that define the quality of the entire paint job. When coating trim, moldings, doors, windows, and other detailed elements, brushes provide the accuracy needed to apply paint exactly where it belongs without spreading to adjacent surfaces. When reaching into corners, crevices, and irregular areas that rollers cannot access, brushes prove indispensable.
The mechanics of brush application differ fundamentally from rolling. A brush works by holding paint within its bristle structure and releasing it through a combination of contact pressure and the capillary action of the bristles. As you draw a loaded brush across a surface, paint flows from the bristles onto the substrate, with the direction and pressure of your stroke influencing how the paint is deposited. This direct, personal control over paint deposition is what makes brushed paint work so suitable for precision applications.
Bristle characteristics profoundly affect brush performance. Natural bristles, derived from animal hair, feature microscopic scales and flagged tips that enhance paint pickup and create smooth release. These characteristics make natural bristle brushes particularly excellent for oil-based paints, varnishes, stains, and similar products. Synthetic bristles, manufactured from nylon, polyester, or blends, are designed for water-based coatings. They maintain their shape when wet, unlike natural bristles which become limp in water, providing consistent performance with latex and acrylic paints.
Brush shape influences how brushed paint applies to different surfaces and situations. Flat brushes with squared edges are versatile workhorses for general painting of flat surfaces. Angled sash brushes feature bristles cut at an angle, creating a pointed tip that excels at cutting in clean lines along edges. Round brushes, less common in house painting but valuable for specialty applications, offer unique capabilities for decorative work. The skilled painter maintains brushes of various shapes and sizes, selecting the right tool for each specific task.
The quality of brushed paint finishes depends heavily on technique. How you load the brush, the angle at which you hold it, the pressure you apply, the direction and length of your strokes, and how you lay off the final surface all contribute to the finished appearance. Developing these techniques through understanding and practice transforms adequate brush work into professional-quality craftsmanship. Quality brushes from suppliers like Tower Tools respond to proper technique by performing consistently and producing beautiful results.
Choosing Between Roller and Brush Application
One of the most important decisions painters face on any project is determining when to use paint roller paint application versus brushed paint techniques. This choice is rarely either-or; most projects require both methods used appropriately for different aspects of the work. Understanding the factors that favor each method helps you make optimal decisions that produce the best possible results.
Surface area is the most obvious consideration. Large, open surfaces like walls, ceilings, floors, and expansive flat areas are ideal candidates for paint roller paint application. The efficiency advantage of rollers becomes overwhelming on large surfaces, where they cover ground many times faster than brush work while producing more consistent results. Attempting to brush-paint an entire room’s walls would be exhausting, time-consuming, and likely to produce inferior results compared to rolling.
Conversely, small areas and detailed elements favor brushed paint application. Trim, moldings, window frames, door panels, railings, furniture, and other detailed elements require the precision that only brushes can provide. Attempting to roll these elements would create messy results with paint spreading beyond intended boundaries. Brushes allow you to place paint exactly where you want it, with clean edges and consistent coverage on complex shapes.
Edges and transitions between surfaces almost always require brush work regardless of how the main surfaces are painted. The technique called cutting in involves using a brush to paint a band along edges before rolling adjacent surfaces. This creates a smooth transition between brushed and rolled areas while ensuring complete coverage right up to edges. Even painters who roller most surfaces rely heavily on brushed paint techniques for this essential edge work.
Surface texture influences method selection. Smooth surfaces can be painted effectively with either method, though each produces somewhat different final textures. Heavily textured surfaces often require roller application to achieve complete coverage of texture valleys, though brush touch-up may still be needed in areas rollers cannot reach. Very rough or irregular surfaces may require brush work to get paint into all the irregularities, particularly on the initial coat.
Paint type can affect method preference. Some paints are formulated specifically for optimal performance with particular application methods. Paints designed for paint roller paint application may have flow and leveling characteristics optimized for roller texture elimination. Other paints may be formulated for brush application, with different rheological properties. While most architectural paints work acceptably with both methods, matching paint to application method can improve results.
Finish quality expectations also influence the choice. For the most critical finishes where appearance is paramount, spray application often produces the smoothest results. When spray is not feasible, the choice between paint roller paint and brushed paint depends on the specific situation. Rollers produce consistent texture across large areas, while brushes can create extremely smooth finishes on smaller surfaces when proper technique is employed.
The Critical Role of Paint Selection
Regardless of whether you choose paint roller paint or brushed paint application, selecting the right paint is fundamental to achieving professional results. Paint formulation affects how the product performs during application, how it levels and dries, how durable the finished surface will be, and how it will look for years to come. Understanding paint characteristics helps you make selections that work well with your chosen application method.
Paint consists of several key components that determine its properties. Pigments provide color and hiding power. Binders create the film that holds pigments together and adheres to surfaces. Solvents or carriers keep the paint liquid during application and evaporate during drying. Additives modify various properties including flow, leveling, drying time, and durability. The balance of these components determines how the paint will perform when applied by roller or brush.
Viscosity, the thickness or resistance to flow of the paint, significantly affects application. Paints with higher viscosity hold on rollers and brushes well but may be harder to spread smoothly. Lower viscosity paints flow more easily but may drip or sag if applied too heavily. Paint manufacturers carefully balance viscosity for intended applications. Paints formulated for paint roller paint application typically have viscosity optimized for good roller pickup and release while minimizing dripping during application.
Leveling properties describe how well paint flows out after application to create a smooth surface. Good leveling is particularly important for brushed paint application, where brush strokes might otherwise remain visible in the dried film. Paints formulated for brush application often include additives that enhance leveling, allowing brush marks to flow out before the paint sets. When selecting paint for brush work, choosing products with excellent leveling helps achieve smooth, professional finishes.
Drying time affects both application and final results. Paints that dry too quickly can be difficult to work with, as edges begin setting before you can blend into them, creating lap marks. Paints that dry too slowly remain vulnerable to dust, insects, and accidental contact for extended periods. The ideal drying time allows adequate working time for both paint roller paint and brushed paint techniques while setting quickly enough to protect the fresh finish.
Sheen level, from flat through satin to high gloss, affects both appearance and performance. Flat paints hide surface imperfections well and provide a muted, sophisticated appearance, but they are less durable and more difficult to clean. Gloss paints create shiny, highly durable surfaces that clean easily, but they highlight every surface imperfection. The choice of sheen depends on the room’s use, aesthetic preferences, and the quality of surface preparation. Both roller and brush techniques work with all sheen levels, though high-gloss finishes are more demanding of technique because they show every application defect.
Quality paints from reputable manufacturers provide the consistent performance that professional results require. While budget paints may seem economical, they often cover poorly, level inadequately, and produce disappointing results regardless of application method. Investing in quality paint makes your paint roller paint and brushed paint work more satisfying and produces finishes that look better and last longer.
Surface Preparation: The Foundation for Both Methods
Whether you are applying paint by roller or brush, surface preparation determines the ultimate success of your project. Even the finest paints applied with perfect technique will fail if the underlying surface is not properly prepared. Both paint roller paint and brushed paint application methods demand clean, sound, properly prepared surfaces to achieve lasting, beautiful results.
Cleaning removes contaminants that interfere with paint adhesion. Dust, dirt, grease, soap residue, cooking oils, smoke deposits, and other surface contamination prevent paint from bonding properly with the substrate. Before any painting begins, surfaces must be cleaned thoroughly. Dust walls with dry cloths or vacuum with brush attachments. Wash surfaces where contamination has accumulated, particularly in kitchens and bathrooms where grease and soap films are common. Remove any visible stains that might bleed through new paint. Allow cleaned surfaces to dry completely before proceeding with painting.
Surface repairs address imperfections that would otherwise show through new paint. Holes from nails, screws, and picture hangers should be filled with appropriate patching compound. Cracks in plaster or drywall need repair with joint compound or suitable filler. Damaged areas should be rebuilt to restore smooth, sound surfaces. After repairs dry, sand them smooth until they blend seamlessly with surrounding areas. Wipe away all sanding dust before painting. These repairs ensure your paint roller paint and brushed paint coverage looks smooth and uniform.
Deglossing ensures adhesion on previously painted surfaces with shiny finishes. Glossy paint creates a slick surface that new paint may not adhere to properly, potentially leading to peeling or flaking. Light sanding with fine-grit sandpaper removes the gloss and creates tooth for new paint to grip. Alternatively, liquid deglosser products chemically etch the surface to improve adhesion. This step is essential when repainting over high-gloss or semi-gloss finishes.
Priming provides the ideal foundation for many painting situations. New drywall requires primer because the porous paper facing absorbs paint unevenly without it. Stains from water damage, smoke, marker, or similar sources need stain-blocking primer to prevent bleeding through new paint. Dramatic color changes benefit from tinted primer that reduces the number of topcoats needed. Bare wood requires primer before paint to seal the grain. Previously patched areas often need spot priming to prevent flashing. Proper priming ensures your paint roller paint and brushed paint application produces uniform, consistent coverage.
Masking and protection preserve areas you do not want painted. Apply painter’s tape along edges where different colors meet or where painted surfaces adjoin trim, ceilings, or other elements. Press tape firmly to create seals that prevent paint bleeding underneath. Cover floors with drop cloths and furniture with plastic sheeting. This protection prevents accidental drips, splatters, and smears that would otherwise require tedious touch-up work.
With surfaces properly prepared, your painting work can proceed smoothly. Preparation may feel like delayed gratification when you are eager to see color on walls, but taking time for thorough preparation dramatically improves final results and long-term durability of both paint roller paint and brushed paint finishes.
Mastering Paint Roller Techniques
Achieving professional results with paint roller paint application requires mastering techniques that go beyond simply rolling paint on walls. The difference between amateur work and professional finishes often comes down to technique refinements that experienced painters have developed through years of practice. Understanding and applying these techniques elevates your roller work from adequate to excellent.
Proper roller loading is the essential first step. Pour paint into your tray, filling the deep well adequately but not to overflowing. Dip the roller into the paint, then roll it back and forth on the tray’s textured ramp surface. This working action distributes paint evenly throughout the roller cover and removes excess. The goal is a roller that is saturated with paint but not dripping. If paint runs off when you lift the roller, it is overloaded. Overloaded rollers cause drips, runs, and uneven coverage, while underloaded rollers leave thin, streaky coverage that requires more passes.
The application pattern affects how evenly paint is distributed across the surface. Many professional painters use a W or M pattern for initial paint distribution. Roll this shape onto the wall with your loaded roller, covering an area roughly three to four feet square. This pattern spreads paint across the section rather than concentrating it in one spot as starting every load in the same location would. After creating the initial pattern, fill in the area with overlapping strokes, working the paint evenly across the entire section.
Pressure during rolling should remain consistent and moderate. Pressing too hard squeezes paint out from under the roller edges, creating visible bands and lines. It also causes roller covers to wear out faster and makes the work more physically tiring. Pressing too lightly fails to deposit adequate paint. Find the moderate pressure that deposits paint evenly and maintain this pressure consistently throughout your strokes. Let the roller do the work; your role is to guide it across the surface.
Maintaining a wet edge is critical for avoiding lap marks. Lap marks occur when you paint over an area where the edge has already begun to dry, creating a visible line in the finished surface. To prevent this, work in sections that you can complete quickly enough to blend into still-wet adjacent areas. Plan your approach to maintain continuous wet edges throughout your painting sequence. Work at a steady pace that keeps edges fresh while still being thorough.
Finishing each section with laying off strokes produces professional smoothness. After filling in a section, make final light passes from top to bottom using minimal pressure. These strokes smooth out roller texture and eliminate any remaining unevenness. The result is a surface that looks uniformly finished rather than showing the random pattern of initial application.
Environmental conditions affect paint roller paint application. Temperature and humidity influence how paint flows, how quickly it dries, and how well it levels. Extremely hot conditions cause rapid drying that makes maintaining wet edges difficult. Very cold temperatures slow drying and can affect adhesion. High humidity extends drying times. Ideal conditions are moderate temperature and humidity, with good air circulation. When conditions are challenging, adjust your technique by working smaller sections and maintaining faster pace.
Perfecting Brushed Paint Application
The quality of brushed paint work often defines the overall impression of a paint job. Edges, trim, and detail work are the elements that catch the eye and reveal the skill level of the painter. Mastering brush techniques transforms these critical areas into showcases of craftsmanship rather than weak points that detract from otherwise good work.
Loading the brush correctly establishes the foundation for every stroke. Dip the brush into paint, submerging approximately one-third of the bristle length. This loads adequate paint while keeping the heel of the brush, where bristles meet the ferrule, relatively clean. Paint that works up into the heel becomes difficult to remove during cleaning and causes bristles to clump together. After dipping, gently tap the brush against the inside of the paint container to remove excess. Avoid wiping the brush across the container rim, which removes too much paint and creates uneven loading.
Brush angle affects both control and finished appearance. For most brushed paint applications, hold the brush at a slight angle to the surface rather than perpendicular. This angle allows the bristle tips to do the work of depositing paint while the body of the brush serves as a paint reservoir. Experiment with different angles to find what works best for various situations. Cutting in along edges may use different angles than covering flat trim surfaces.
The cutting in technique creates clean lines where different colors or surfaces meet. Use an angled sash brush for this work, loading it moderately rather than heavily. Heavy loads are harder to control and more likely to push paint where you do not want it. Draw the brush along the edge with steady, confident strokes. Let the bristle tips establish the line while the brush body deposits paint. Practice develops the steady hand and consistent technique needed for crisp cut lines that define professional work.
Stroke technique affects both coverage and finished appearance. Apply brushed paint using smooth, flowing strokes rather than short, choppy motions. On wood surfaces, brush in the direction of the grain. On walls and other surfaces, use consistent stroke direction. Avoid overworking paint by brushing repeatedly over the same area, which disturbs partially set paint and creates visible brush marks in the finished surface. Apply, spread to even coverage, and leave the paint to level and dry.
The laying off technique produces the smoothest brush finishes. After applying and spreading paint across a section, make final light strokes all in the same direction, typically top to bottom on vertical surfaces. These finishing strokes use minimal pressure and a lightly loaded brush to smooth the applied paint and minimize visible brush marks. Combined with quality paint that levels well, this technique creates beautifully smooth brushed paint finishes.
Wet edge management applies to brush work just as it does to rolling. Complete each section and blend into adjacent areas before edges begin to dry. Painting over partially dried paint creates lap marks that mar the finished surface. Work efficiently in appropriately sized sections to keep edges fresh while maintaining quality.
Quality brushes make proper technique easier to execute. Brushes that hold their shape, carry appropriate paint loads, and release paint smoothly respond to technique refinements in ways that cheap brushes cannot. Investing in quality brushes from Tower Tools provides tools that help you achieve the professional brushed paint results your technique deserves.
Combining Roller and Brush for Complete Projects
Most painting projects require both paint roller paint and brushed paint application methods working together for complete, professional results. Understanding how to coordinate these methods produces seamless finishes where the transition between rolled and brushed areas is invisible. This coordination separates skilled painters from those whose work shows obvious method transitions.
The standard approach begins with brush work. Before rolling any surface, use a brush to cut in around all edges, corners, and obstacles. Paint a band several inches wide along ceiling lines, in corners where walls meet, around door and window frames, around outlets and switches, and anywhere else the roller cannot reach or would leave incomplete coverage. This edge work creates a border of applied paint that the roller will blend into.
Timing the transition from brush to roller is important. The cut-in brush work should still be wet when you roll into it. This allows the rolled paint to blend seamlessly with the brushed edges, eliminating any visible line between the two methods. If brush work dries before rolling, a visible band may remain where the two application methods meet. Work efficiently to maintain wet edges, or cut in smaller sections that you can roll while the brush work is still fresh.
Technique at the transition zone requires attention. When rolling up to brushed edges, do not try to roll directly over the brush work. Instead, roll up to and slightly overlapping the inner edge of the brushed band, allowing the two areas to blend. Use light pressure near edges to avoid pushing excess paint into corners or creating heavy buildup. The goal is a smooth, even transition where neither the brushed nor rolled areas are visually distinct.
For trim and detailed elements, the sequence typically reverses. You may roll walls first, being careful near trim areas, then follow with brush work on the trim itself. Alternatively, you may paint trim first, tape it off, then roll adjacent walls. The best sequence depends on the specific situation, the colors involved, and your confidence with various techniques. Both approaches can produce excellent results when executed carefully.
Multiple coats require repeating the brush-then-roll sequence. For each coat, cut in with brush work, then roll the field while edges remain wet. This maintains the blended transition through all coats. Some painters cut in the entire room before rolling any walls, but this approach risks edges drying before rolling reaches them. For most situations, cutting in and rolling one wall at a time maintains better wet edge control.
Complex rooms with many edges, obstacles, and detailed elements require more brush work relative to rolling. Simple rooms with large, open walls and minimal trim require proportionally more rolling. Assess each project and allocate your paint roller paint and brushed paint efforts appropriately for the specific characteristics of the space.
Troubleshooting Common Problems
Even experienced painters occasionally encounter problems with paint roller paint and brushed paint application. Understanding common issues, their causes, and their solutions helps you avoid problems and correct them when they occur. This troubleshooting knowledge separates painters who consistently produce quality work from those who struggle with recurring issues.
Lap marks appear as visible lines where paint edges have overlapped after partial drying. This problem affects both roller and brush work. The cause is allowing edges to dry before blending in adjacent coverage. The solution is working faster, working smaller sections, or adjusting paint formulation if possible. Some paints have longer open times that allow more working time before edges set. In extreme conditions of heat or low humidity, additives can extend open time.
Roller marks, sometimes called roller stipple or orange peel texture, occur when paint does not level adequately after roller application. Causes include using rollers with inappropriate nap length for the surface, applying paint too thickly, rolling too slowly, or using paint with poor leveling characteristics. Solutions include selecting appropriate nap length, applying thinner coats, rolling at consistent pace, and choosing paints formulated for smooth paint roller paint finishes.
Brush marks remain visible in dried brushed paint finishes when paint fails to level after application. Contributing factors include paint that dries too quickly, paint with poor leveling properties, excessive brushing that overworks partially set paint, and inadequate technique. Solutions include choosing paints with better leveling characteristics, maintaining appropriate environmental conditions, and refining technique to apply and leave paint rather than overworking it.
Drips and runs result from applying too much paint, painting on vertical surfaces without adequate care, or using paint that is too thin for the application. With rollers, overloaded roller covers are usually the cause. With brushes, overloaded brushes or failure to spread applied paint adequately create drips. Solutions include loading tools appropriately, spreading paint to even thickness, and watching for drips as you work so you can brush them out before they set.
Poor coverage requiring excessive coats often results from inadequate paint quality, insufficient loading of application tools, or spreading paint too thin in an attempt to avoid drips. Quality paints provide better coverage. Loading rollers and brushes adequately ensures enough paint reaches the surface. Applying paint at appropriate thickness balances coverage against drip risk.
Adhesion failures where paint peels, flakes, or separates from the surface result from inadequate surface preparation. Contamination, gloss, moisture, or unsound existing coatings all prevent proper adhesion. The solution is always thorough surface preparation before any paint is applied. Once adhesion failure occurs, the affected area must be scraped, sanded, primed, and repainted properly.
Uneven sheen, where some areas appear shinier or flatter than adjacent areas, results from inconsistent paint thickness, variable surface porosity, or inadequate priming. Solutions include applying consistent thickness across all areas, priming porous surfaces uniformly, and ensuring complete, even coverage with each coat.
Learning from problems improves your paint roller paint and brushed paint work over time. When issues occur, analyze the cause and adjust your approach accordingly. This continuous improvement mindset is characteristic of painters who develop genuine skill and consistently produce excellent results.
Tool Selection for Professional Results
The quality and suitability of your tools directly affects the quality of your paint roller paint and brushed paint work. Professional painters invest in quality equipment because they understand that tools are partners in producing excellent results. Selecting appropriate tools for specific applications ensures you have the capabilities needed for any painting situation.
Roller cover selection begins with matching nap length to surface texture as discussed earlier. Beyond nap length, consider cover material for your paint type. Synthetic covers work well with latex and acrylic paints. Natural fiber and blended covers suit oil-based products. Microfiber covers offer low splatter and smooth finishes with most paint types. Quality covers from reputable manufacturers provide consistent performance and shed fewer fibers onto painted surfaces than cheap alternatives.
Roller frame quality affects the painting experience and results. Quality frames spin smoothly on well-designed bearings, allowing effortless rolling without friction or resistance. The cage grips roller covers firmly without wobbling. Handles are comfortable for extended use and feature threaded ends for extension pole attachment. Investing in a quality frame improves both comfort and finished quality.
Extension poles transform ceiling and high wall painting. Telescoping models adjust to various lengths, accommodating different ceiling heights. Quality poles lock securely and attach firmly to roller frames. Even for standard rooms, extension poles make rolling more comfortable and efficient.
Brush selection requires matching bristle type to coating. Natural bristle brushes excel with oil-based products. Synthetic bristle brushes are designed for water-based paints. Brush shape should suit your application: angled sash brushes for cutting in, flat brushes for general work, smaller brushes for detail areas. Quality brushes hold their shape, carry appropriate paint loads, and maintain precision edges for clean brushed paint work.
Paint trays, bucket grids, brush keepers, and other accessories support your primary tools. Quality trays have adequate capacity and proper textured surfaces. Bucket grids suit larger projects where tray capacity is limiting. Brush keepers help maintain brushes between painting sessions on multi-day projects.
Tower Tools offers comprehensive selection of professional-quality painting tools. Their range includes rollers and covers suited to every application, quality frames and extension poles, brushes for all coating types and applications, and accessories that support efficient, quality work. Sourcing your paint roller paint and brushed paint application tools from a quality supplier ensures you have equipment capable of professional results.
Tool Maintenance and Care
Quality painting tools represent investments that deserve protection through proper maintenance. Rollers, brushes, and accessories properly cleaned and stored will serve through many projects, providing consistent performance and genuine value. Neglecting tool care leads to premature deterioration, degraded performance, and unnecessary replacement costs.
Cleaning brushes immediately after use is essential. Paint that dries in bristles is extremely difficult to remove and often ruins the brush permanently. For water-based paints, rinse brushes under warm running water, working water through bristles from ferrule to tips. Add dish soap and work it through the bristles to remove remaining paint. Rinse thoroughly until water runs clear. For oil-based paints used in brushed paint applications, work appropriate solvent through bristles to dissolve paint, then wash with soap and water to remove solvent residue.
After cleaning, shake excess water from brushes and reshape bristles to their proper form. Many painters wrap clean brushes in paper or original sleeves to maintain bristle shape during storage. Store brushes hanging by their handles or lying flat. Never store brushes standing on their bristles, as this causes permanent bending that ruins precision edges.
Roller covers can be cleaned for reuse, though the economics depend on cover quality and project scope. For water-based paints, rinse covers thoroughly under running water while squeezing and working paint from the fabric. Continue until water runs clear, then squeeze or spin out excess water and stand covers on end to dry. For oil-based paint roller paint applications, work appropriate solvent through the cover, then wash with soap and water.
Many painters treat roller covers as disposable, especially for smaller projects where cleaning time exceeds cover value. However, quality covers are durable enough that cleaning and reuse makes economic sense for professional painters who use premium covers regularly.
Roller frames need only simple maintenance. Wipe clean after use and ensure spinning mechanisms remain free of dried paint. Store in dry conditions to prevent rust. Quality frames maintained properly last for years.
Store all painting tools in clean, dry conditions away from temperature extremes. Organize storage to protect tools and make them easy to find. Proper storage prevents damage and ensures tools are ready when you need them.
Professional Tips for Superior Results
Beyond fundamental techniques, experienced painters have developed insights and tips that elevate paint roller paint and brushed paint work from good to exceptional. These professional refinements, accumulated through years of practice, represent the fine points that separate truly skilled painters from those who merely adequate.
Lighting dramatically affects your ability to see and correct problems. Work in bright, even lighting that reveals holidays, thin spots, drips, and other defects while paint is still workable. Many professional painters use work lights positioned to cast raking light across surfaces, highlighting imperfections that would be invisible under flat lighting. What you cannot see, you cannot correct.
Boxing paint ensures color consistency. Paint color can vary slightly between cans, even with the same batch number. For seamless results, combine all paint for a project into a larger container and mix thoroughly before pouring into working containers. This boxing eliminates the visible color shifts that can occur when switching between cans.
Strain paint before use if any contamination is possible. Paint skins, dried bits, dust, and debris create problems when they end up on your walls. Pour paint through a mesh strainer into clean containers to remove any contaminants before they cause problems.
Condition new rollers before use. New roller covers can shed fibers that end up in your paint. Before loading with paint, wrap the new cover with painter’s tape and pull it off to remove loose fibers. This conditioning prevents fiber shedding that would otherwise contaminate your finish.
Work from dry to wet when rolling large surfaces. Start each roller load in an unpainted area and roll into the previously painted section. This approach ensures wet edges are consistently blended and prevents the double thickness that occurs when starting in previously painted areas.
Feather out edges when you must stop mid-wall. If you cannot complete a wall in one session, feather the edge to thin coverage rather than stopping with a thick paint edge. When you resume, the feathered edge blends more invisibly than a heavy edge would.
Evaluate your work from multiple angles. What looks good straight-on may show problems when viewed from oblique angles. Check your paint roller paint and brushed paint work from various viewpoints to catch problems before paint dries.
Building Your Complete Painting Toolkit
Assembling tools for both paint roller paint and brushed paint applications creates comprehensive capability for any painting project. Building systematically around essential items, then adding specialized tools as needs arise, develops a toolkit that serves you well through projects of all types and scales.
Essential roller equipment includes at least one quality frame with comfortable handle and smooth bearings. Stock roller covers appropriate for your common surfaces: short nap for smooth surfaces, medium nap for standard textured walls, and long nap available for heavily textured situations. An extension pole, preferably telescoping for adjustable length, enables ceiling work without ladders. A quality paint tray with sturdy construction and proper texture completes the roller setup.
Essential brushes include an angled sash brush in the two to two-and-a-half inch range for cutting in work. A flat brush around three to four inches wide addresses larger brushed areas and general work. Smaller brushes in one to two inch sizes handle fine detail and touch-up work. For oil-based work, natural bristle brushes provide optimal performance. For water-based paints, synthetic bristle brushes are appropriate. Most painters maintain brushes suited to both coating categories.
Surface preparation tools deserve inclusion. Scrapers remove loose paint and surface contaminants. Sanding blocks smooth repairs and degloss surfaces. Putty knives apply patching compounds. Caulk guns seal gaps and joints. These preparation tools ensure surfaces are ready for paint.
Masking and protection supplies prevent painting mishaps. Painter’s tape in various widths handles different masking situations. Drop cloths protect floors and furniture. Plastic sheeting covers items that cannot be removed from work areas.
Storage and organization systems keep tools accessible and protected. Tool bags or boxes contain smaller items. Roller trays stack for compact storage. Brush keepers maintain bristle shape between uses on multi-day projects.
Tower Tools offers everything needed to build a complete toolkit for both paint roller paint and brushed paint applications. Their comprehensive selection allows systematic toolkit development, adding quality items as needs and skills develop.
Why Choose Tower Tools for Your Painting Supplies
For painters throughout the UAE and GCC region, Tower Tools has established itself as the premier destination for professional-quality painting supplies and equipment. Their commitment to quality products, competitive pricing, and excellent service makes them the preferred source for contractors, maintenance professionals, and serious DIY painters alike.
The product range at Tower Tools covers every aspect of paint roller paint and brushed paint application needs. Their selection includes premium roller covers in all nap lengths and materials, quality roller frames with smooth bearings and comfortable handles, extension poles for efficient ceiling work, and complete roller systems ready for immediate use. For brush work, they offer natural bristle brushes for oil-based applications, synthetic brushes for water-based coatings, and specialty brushes for unique situations.
Beyond application tools, Tower Tools provides surface preparation equipment including scrapers, sanders, and related tools. Their masking and protection supplies include quality painter’s tape and drop cloths. Paint trays, bucket grids, and accessories complete their comprehensive painting supplies offering.
Quality assurance ensures every product meets professional standards. When you purchase from Tower Tools, you receive equipment that performs consistently, project after project. This reliability matters for professional painters whose reputation depends on consistent results and for homeowners who want their DIY projects to look professionally finished.
Competitive pricing makes premium tools accessible. Tower Tools understands that value means quality equipment at fair prices. Their pricing makes professional-grade paint roller paint and brushed paint tools affordable for everyone from individual homeowners to large contracting operations.
Customer service extends beyond selling products. The Tower Tools team provides guidance on tool selection, technical information about products, and efficient order processing. For bulk purchasers, custom quotations address volume needs with appropriate pricing.
Convenient delivery options serve customers throughout the region. UAE customers enjoy next-day delivery in major cities and pickup availability for confirmed orders. Customers across the GCC including Oman, Lebanon, Saudi Arabia, Qatar, Bahrain, and Kuwait are served through distribution partners and shipping arrangements.
Frequently Asked Questions
What is the difference between paint roller paint and brushed paint application?
Paint roller paint application uses cylindrical roller covers to efficiently apply paint across large, flat surfaces like walls and ceilings. The roller picks up paint and releases it evenly as it moves across the surface, providing fast coverage with consistent texture. Brushed paint application uses bristle brushes to apply paint with precision and control, ideal for edges, trim, detail work, corners, and areas rollers cannot reach. Most painting projects use both methods: brushes for cutting in and detail work, rollers for filling large areas efficiently.
When should I use a roller versus a brush?
Use rollers for large, open surface areas like walls, ceilings, and floors where efficiency and consistent coverage matter most. Use brushes for cutting in along edges where different colors meet, painting trim, moldings, and detailed elements, reaching corners and tight spaces, and any application requiring precision control. Most projects require both methods working together, with brush work establishing edges and rollers covering the main surfaces.
How do I prevent lap marks when painting?
Lap marks occur when paint edges dry before you blend adjacent coverage into them. Prevent lap marks by working at a pace that keeps edges wet, completing sections before edges begin to set, blending new coverage into still-wet edges, working in appropriately sized sections for the drying conditions, and choosing paints with longer open times when conditions are challenging. This applies to both paint roller paint and brushed paint applications.
What causes roller marks or texture in painted surfaces?
Roller marks result from paint failing to level adequately after application. Common causes include using roller covers with inappropriate nap length for the surface, applying paint too thickly, rolling too slowly or inconsistently, using paint with poor leveling characteristics, and overworking areas by excessive rolling. Solutions include selecting appropriate nap length, applying thinner coats, maintaining consistent rolling speed, choosing quality paints, and using proper laying off technique to smooth the final surface.
How do I choose between natural and synthetic bristle brushes?
Natural bristle brushes work best with oil-based paints, varnishes, stains, and similar solvent-based products. The natural bristle structure holds and releases these products beautifully for smooth brushed paint finishes. Synthetic bristle brushes are designed for water-based coatings including latex and acrylic paints. Natural bristles absorb water and become limp when used with water-based products, so synthetic brushes are necessary for these applications. Many painters maintain separate brushes for different coating types.
How do I clean and maintain my painting tools?
Clean tools immediately after use, before paint dries. For water-based paints, rinse under warm water, work soap through bristles or roller fabric, and rinse until water runs clear. For oil-based products, use appropriate solvent first, then wash with soap and water. Shake out excess water, reshape brush bristles, and allow tools to dry completely before storage. Store brushes hanging or lying flat, never standing on bristles. Proper cleaning extends tool life dramatically.
Does Tower Tools deliver throughout the UAE and GCC?
Yes, Tower Tools provides delivery across the UAE and GCC region. Within the UAE, next-day delivery is available in major cities, and customers can pick up confirmed orders. Customers in Oman and Lebanon are served by official distributors with local stock. Saudi Arabia, Qatar, Bahrain, and Kuwait are served through shipping partners with delivery times varying by location. Contact Tower Tools for specific delivery information.
Conclusion: Mastering Both Methods for Professional Excellence
Throughout this comprehensive guide, we have explored the complementary worlds of paint roller paint and brushed paint application methods. From understanding the fundamental principles underlying each approach to mastering advanced techniques that produce flawless finishes, you now possess the knowledge to approach any painting project with confidence and skill.
The partnership between roller and brush methods enables complete painting capability. Rollers deliver the efficiency essential for covering large surfaces in reasonable time with consistent, even results. Brushes provide the precision and control necessary for edges, details, and trim work that define the overall quality of a paint job. Understanding when to use each method and how to coordinate them creates seamless results where application method is invisible in the finished work.
Quality tools amplify the benefits of proper technique. Rollers that load evenly, spin smoothly, and release paint consistently make paint roller paint work more satisfying and produce better results. Brushes that hold their shape, carry appropriate loads, and maintain precision edges enable the clean lines and smooth finishes that characterize skilled brushed paint work. Investing in quality tools from suppliers like Tower Tools provides equipment worthy of your developing skills.
Surface preparation creates the foundation that both application methods require. No technique or tool can compensate for inadequate preparation. Clean, sound, properly primed surfaces accept paint readily and hold it durably. Taking time for thorough preparation, though it may feel like delayed gratification, dramatically improves results and long-term coating performance.
Practice and continuous improvement develop the skills that separate accomplished painters from beginners. Each project offers opportunities to refine technique, experiment with approaches, and learn from both successes and challenges. The mindset of continuous improvement characterizes painters who develop genuine expertise over time.
Tower Tools provides everything you need for successful paint roller paint and brushed paint applications. Their comprehensive selection of quality rollers, brushes, and accessories ensures you have professional-grade tools for every painting situation. Their commitment to quality, competitive pricing, and convenient service makes them the premier choice for painters throughout the UAE and GCC region.
Ready to achieve professional painting results with both roller and brush techniques? Visit www.towertools.ae today to explore their complete range of painting tools and supplies. Discover the quality equipment that supports your developing skills and produces the beautiful, professional finishes your projects deserve.